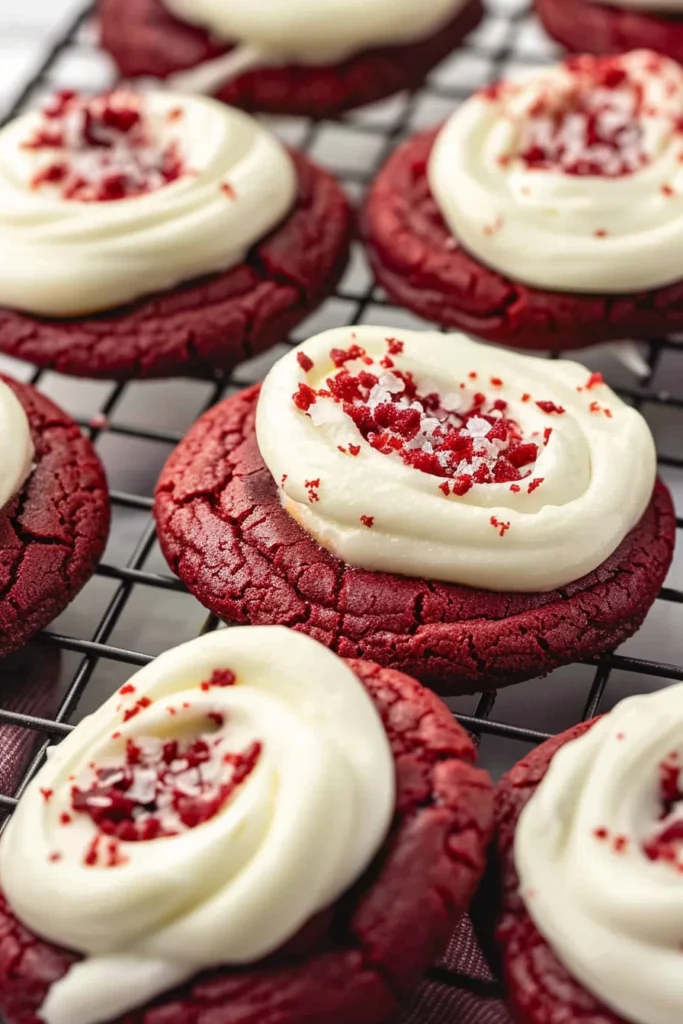
Red velvet cookies with cream cheese frosting are a delightful twist on the classic red velvet cake, offering a rich and indulgent treat that’s perfect for any occasion. Whether you’re planning a holiday dessert, a birthday treat, or simply want to satisfy your sweet tooth, these cookies combine the best of both worlds: the soft, melt-in-your-mouth texture of cookies and the creamy sweetness of cream cheese frosting.

Table of Contents
The History of Red Velvet Cake
Red velvet cake, the predecessor of red velvet cookies, has an intriguing history that dates back to the early 20th century. Its iconic red color is said to have been a result of the natural pigments in cocoa, though it became more vibrant with the introduction of food coloring over time. The cake was initially popularized in the Southern United States and quickly became a staple in many American kitchens, especially around holidays and celebrations.
What sets red velvet cake apart from other chocolate cakes is its subtle, tangy flavor. This unique taste comes from the addition of buttermilk and vinegar, which balances the richness of the cocoa powder. It wasn’t long before this beloved cake was adapted into various forms, including cupcakes, cheesecakes, and—of course—cookies. Red velvet cookies maintain that signature flavor profile while offering a more portable and bite-sized treat.
If you love the vibrant flavor of red velvet, consider trying these Red Velvet Cupcakes next. They offer the same rich taste, but in a delightful cupcake form, perfect for your next celebration.
Key Ingredients in Red Velvet Cookies
Essential Ingredients for Red Velvet Cookies
To make the perfect red velvet cookies, it’s important to have the right ingredients. These ingredients work together to create the soft, chewy texture and the signature red velvet flavor that make this treat so irresistible.
- All-Purpose Flour – The base of any cookie recipe, all-purpose flour provides structure to the dough. Sifting it will ensure a light and airy texture in your cookies.
- Cocoa Powder – Use unsweetened cocoa powder to give the cookies their rich, chocolatey undertone. It’s what adds that signature flavor to red velvet treats.
- Baking Soda – This leavening agent helps the cookies rise and achieve the right texture, making them light and fluffy.
- Salt – A pinch of salt helps balance out the sweetness of the cookies and enhances the other flavors.
- Butter – The fat in the dough, butter adds richness and contributes to the cookie’s chewy texture. Always use unsalted butter to have more control over the salt content.
- Granulated Sugar – The sugar not only sweetens the cookies but also helps create a tender texture.
- Brown Sugar – Adding a bit of brown sugar brings depth and moisture to the dough, ensuring a soft, chewy cookie.
- Eggs – Eggs bind the ingredients together and help provide structure, making the cookies hold their shape.
- Buttermilk – The tangy flavor from buttermilk is crucial in red velvet desserts. It reacts with the baking soda to help the cookies rise while contributing to their soft texture.
- Vanilla Extract – A touch of vanilla enhances the overall flavor profile, complementing the cocoa and buttermilk.
- Red Food Coloring – The key to giving red velvet cookies their signature bold color, food coloring makes the cookies vibrant and visually appealing.
How to Choose the Best Cream Cheese for Frosting
When it comes to the frosting, the cream cheese is just as important as the cookies themselves. The frosting should be rich, smooth, and tangy to balance out the sweetness of the cookie. For the best results, choose full-fat cream cheese. This type of cream cheese has the perfect texture and flavor for making a rich, smooth frosting that won’t be too runny.
Avoid low-fat or non-fat cream cheese, as these can make your frosting too thin and less flavorful. Additionally, it’s important to use room temperature cream cheese to ensure it blends well with the butter and sugar, resulting in a creamy, lump-free frosting.
For those who adore the combination of cream cheese and rich desserts, these Cream Cheese Brownies are the perfect next recipe to try. The creamy, tangy swirl inside the brownies will remind you of the delicious cream cheese frosting in these cookies!
Step-by-Step Guide to Making Red Velvet Cookies
Preparing the Dough for Red Velvet Cookies
Making red velvet cookies is a simple, yet rewarding process that begins with preparing the dough. Start by preheating your oven to 350°F (175°C) and lining a baking sheet with parchment paper to ensure easy cleanup.
- Mix the Dry Ingredients:
In a medium bowl, whisk together the all-purpose flour, cocoa powder, baking soda, and salt. Sifting the cocoa powder helps prevent clumps, ensuring a smooth dough. - Cream the Butter and Sugar:
In a large mixing bowl, cream together the unsalted butter, granulated sugar, and brown sugar using a hand mixer or stand mixer. Beat until the mixture becomes light and fluffy, which should take about 2-3 minutes. This step is key to achieving a soft, tender cookie. - Add the Wet Ingredients:
To the creamed butter mixture, add the egg, vanilla extract, and buttermilk. Mix well until everything is fully incorporated. Finally, add the red food coloring. Be sure to add enough coloring to achieve a vibrant red hue—this is the hallmark of red velvet cookies. - Combine Wet and Dry Ingredients:
Gradually add the dry ingredients to the wet mixture. Mix on low speed to avoid flour flying everywhere. Once combined, increase the speed for a few seconds to ensure a smooth dough forms. The dough should be soft but not sticky. - Chill the Dough:
For the best results, chill the dough in the refrigerator for at least 30 minutes. Chilling helps the dough firm up, making it easier to scoop and shape the cookies, and prevents them from spreading too much during baking.
Baking and Achieving the Perfect Texture
Once the dough is chilled, it’s time to bake!
- Scoop the Dough:
Use a cookie scoop or tablespoon to portion out the dough into uniform balls. Place them on the prepared baking sheet about 2 inches apart. This will allow the cookies to spread evenly as they bake. - Bake the Cookies:
Bake the cookies for 10-12 minutes, or until the edges are slightly golden and the centers are set. Keep an eye on them, as baking times can vary depending on your oven. The cookies should remain soft, so be careful not to overbake them. - Cool on a Wire Rack:
Once the cookies are done baking, let them cool on the baking sheet for about 5 minutes before transferring them to a wire rack. This ensures that they hold their shape and don’t crumble when moved. Allow the cookies to cool completely before frosting.
Cream Cheese Frosting – The Perfect Pairing
Why Cream Cheese Frosting Complements Red Velvet Cookies
The combination of red velvet cookies and cream cheese frosting is a match made in dessert heaven. The tangy, smooth cream cheese frosting cuts through the sweetness of the cookie and adds a creamy, rich texture that perfectly complements the soft, chewy cookie base. This frosting is a key component of red velvet desserts and adds an extra layer of indulgence to each bite.
The slightly tangy flavor of the cream cheese also enhances the cocoa flavor in the cookies, making it a balanced and satisfying treat. Without the cream cheese frosting, red velvet cookies would simply be another chocolate cookie—this frosting elevates them to a whole new level.
How to Make the Best Cream Cheese Frosting from Scratch
Making cream cheese frosting from scratch is easy and results in a much smoother and richer frosting than store-bought versions. Here’s how to do it:
- Ingredients:
- 8 oz (226 g) full-fat cream cheese, softened
- 1/4 cup unsalted butter, softened
- 2 cups powdered sugar
- 1 tsp vanilla extract
- A pinch of salt (optional, to balance sweetness)
- Instructions:
- In a large mixing bowl, beat the softened cream cheese and butter together until smooth and creamy. You can use a hand mixer or a stand mixer for this.
- Gradually add the powdered sugar, about 1/4 cup at a time, and continue mixing until the frosting is smooth and fluffy.
- Stir in the vanilla extract and a pinch of salt (if using). Continue to mix until well combined.
- If the frosting is too thick, add a teaspoon of milk at a time until it reaches your desired consistency.

- Frost the Cookies:
Once the cookies have cooled completely, pipe or spread a generous amount of cream cheese frosting on top of each cookie. You can be creative with the design by swirling the frosting or adding sprinkles, small candy decorations, or even a drizzle of chocolate syrup for extra flair.
Decorating Your Red Velvet Cookies
Creative Ways to Decorate Your Cookies
Decorating red velvet cookies adds an extra touch of fun and personality to your treats. While cream cheese frosting is the classic choice, there are many ways to get creative and elevate your red velvet cookies with unique designs and toppings.
- Sprinkles:
Add a pop of color with red, white, or gold sprinkles. This simple touch makes your cookies look festive and fun, especially for holidays like Christmas, Valentine’s Day, or birthdays. - Piped Swirls:
For a more elegant look, pipe the cream cheese frosting in swirling patterns. Use a large star tip or a simple round tip to create textured designs that make the cookies look professionally decorated. - Chocolate Drizzle:
A drizzle of melted white or dark chocolate can add richness and sophistication to your cookies. Simply melt your choice of chocolate, then drizzle it over the frosted cookies using a spoon or piping bag. - Edible Glitter or Dust:
If you’re feeling extra festive, sprinkle edible glitter or dust over the cookies. This works especially well for special occasions like weddings, birthdays, or New Year’s Eve. - Miniature Hearts or Stars:
For a fun touch, you can top your cookies with small edible shapes like hearts or stars. These are perfect for Valentine’s Day or to create themed treats for a party.
Adding Color and Texture to Your Frosting
You don’t have to stop at basic white frosting. There are several ways to enhance the appearance and texture of your cream cheese frosting:
- Add Food Coloring:
Since the cookies themselves are already vibrant, you can add a touch of food coloring to the frosting for a bolder effect. Pink, gold, or even green could work beautifully with the red velvet color. Just a few drops will create a soft, pastel hue or a more intense color, depending on your preference. - Crushed Nuts or Candy:
For some extra texture, sprinkle crushed nuts (like pecans or walnuts) or even crushed candy pieces (like peppermint or toffee) over the frosting. This adds a crunch and variety to the soft texture of the cookies. - Layering Frosting:
You can add an extra layer of frosting for an even richer taste. Try adding a thin layer of chocolate ganache or vanilla buttercream before frosting with the cream cheese for a multi-layer effect that adds depth to the flavor.
Tips for Perfect Red Velvet Cookies
Troubleshooting Common Baking Issues
Sometimes, things don’t go exactly as planned while baking. Here are a few common issues you might encounter and how to fix them:
- Flat Cookies:
If your cookies spread too much and end up flat, it could be due to the dough being too warm or the baking sheet not being lined with parchment paper. Make sure to chill the dough long enough and use parchment paper to prevent sticking and excessive spreading. - Dry Cookies:
Overbaking or using too much flour can result in dry cookies. If you find that your cookies are too dry, try reducing the baking time slightly. The cookies should look soft in the center when you take them out of the oven, as they will continue to set while cooling. - Cookies Sticking to the Baking Sheet:
Ensure you line your baking sheet with parchment paper or use a non-stick baking mat to prevent the cookies from sticking. This makes them much easier to remove and helps maintain their perfect shape. - Frosting Running Off:
If your frosting is too runny, it might be due to the cream cheese being too soft or the frosting not being mixed enough. Make sure to beat the frosting ingredients thoroughly, and if it’s too thin, you can add more powdered sugar to thicken it up.
Ensuring the Right Cookie Texture
Achieving the perfect red velvet cookie texture is all about balance. Here are some tips to ensure your cookies turn out soft, chewy, and perfect every time:
- Don’t Overmix the Dough:
Once you add the dry ingredients to the wet ingredients, mix just until combined. Overmixing can lead to dense cookies. The dough should be thick, but still soft enough to scoop and shape. - Chill the Dough:
Chilling the dough is essential. This prevents the cookies from spreading too much during baking and helps them maintain a thick, chewy texture. It also allows the flavors to meld together for a better taste. - Monitor Your Oven Temperature:
Different ovens can have slight temperature variations, so consider using an oven thermometer to ensure your oven is preheating to the correct temperature. Baking at a lower temperature than recommended could result in cookies that don’t set properly, while baking at too high of a temperature might cause them to brown too quickly.
Storage and Shelf Life of Red Velvet Cookies
How to Store Red Velvet Cookies to Keep Them Fresh
Proper storage is key to keeping your red velvet cookies fresh and delicious for as long as possible. Follow these simple tips to preserve their texture and flavor:
- Room Temperature Storage:
If you plan to eat the cookies within a few days, store them in an airtight container at room temperature. This will keep the cookies soft and chewy. They should last for about 3-4 days. - Refrigerating for Longer Freshness:
If you want your cookies to stay fresh for a longer period, refrigerate them in an airtight container. The cool temperature will keep them fresh for up to a week. Just be sure to bring them to room temperature before serving to restore the perfect texture. - Avoid Storing Frosted Cookies Together:
If you have frosted cookies, be sure to layer them with parchment paper to avoid the frosting from sticking to the other cookies. You can also refrigerate the cookies separately from the frosting and frost them just before serving.
Freezing Red Velvet Cookies for Future Enjoyment
If you’d like to make a batch of red velvet cookies in advance or have leftovers, freezing is a great option. Here’s how to do it:
- Freezing Unbaked Dough:
Scoop the dough into cookie-sized portions and place them on a baking sheet in the freezer. Once frozen, transfer the dough balls into a Ziploc bag or airtight container and store them in the freezer for up to 3 months. When you’re ready to bake, simply preheat the oven and bake directly from frozen, adding a minute or two to the baking time. - Freezing Baked Cookies:
Once the cookies have completely cooled, place them in a single layer on a baking sheet and freeze for 1-2 hours. After they are frozen, transfer them into a freezer-safe container or bag. They can be frozen for up to 3 months. When ready to enjoy, simply thaw the cookies at room temperature for a few hours or pop them in the microwave for a few seconds for that freshly baked taste.
FAQs About Red Velvet Cookies with Cream Cheese Frosting
Can I make red velvet cookies without cream cheese frosting?
Yes, while cream cheese frosting is the traditional choice, you can substitute it with other types of frosting, like buttercream, chocolate ganache, or even whipped cream, depending on your preference.
How do I know when my cookies are done baking?
Red velvet cookies should be soft in the center but firm around the edges. If the edges are golden and the centers have slightly set, they’re ready to come out of the oven. Keep in mind, they will continue to firm up as they cool.
Can I make red velvet cookies ahead of time?
Yes, you can bake the cookies ahead of time and store them in an airtight container. Alternatively, you can freeze the cookie dough or the baked cookies for later use. Just be sure to frost them after they’ve been stored or thawed.
Why did my cookies turn out too dry or crumbly?
Dry or crumbly cookies are often the result of overbaking or using too much flour. Make sure to measure your ingredients properly and monitor the baking time closely to avoid overbaking. If the dough is too thick, try adding a bit more buttermilk for better texture.
Conclusion: Enjoying Your Red Velvet Cookies with Cream Cheese Frosting
Red velvet cookies with cream cheese frosting are a beautiful and delicious treat that brings together the richness of cocoa, the tanginess of cream cheese, and the perfect balance of sweetness. Whether you’re baking them for a special occasion or simply to enjoy with a cup of tea or coffee, these cookies are sure to impress.
Print
Red Velvet Cookies with Cream Cheese Frosting – The Perfect Treat for Any Occasion
Description
These soft, chewy red velvet cookies are the perfect treat for any occasion. With their vibrant color and rich cocoa flavor, they’re elevated by a smooth, tangy cream cheese frosting that complements every bite. Whether you’re celebrating a special event or just indulging in a sweet snack, these cookies are a delightful choice.
Ingredients
For the Cookies:
2 1/2 cups all-purpose flour
1 tbsp cocoa powder
1 tsp baking soda
1/2 tsp salt
1 cup unsalted butter, softened
1 cup granulated sugar
1/4 cup brown sugar, packed
1 large egg
1 tsp vanilla extract
1 tbsp buttermilk
2 tbsp red food coloring
For the Cream Cheese Frosting:
8 oz cream cheese, softened
1/4 cup unsalted butter, softened
2 cups powdered sugar
1 tsp vanilla extract
A pinch of salt (optional)
Instructions
Preheat the Oven:
Preheat your oven to 350°F (175°C). Line a baking sheet with parchment paper.Mix the Dry Ingredients:
In a medium bowl, whisk together the flour, cocoa powder, baking soda, and salt. Set aside.Cream the Butter and Sugars:
In a large bowl, beat the butter, granulated sugar, and brown sugar until light and fluffy, about 2-3 minutes.Add the Wet Ingredients:
Add the egg, vanilla extract, buttermilk, and red food coloring to the butter mixture. Beat until well combined.Combine Wet and Dry Ingredients:
Gradually add the dry ingredients to the wet ingredients and mix until just combined. The dough will be thick and slightly sticky.Chill the Dough:
Chill the dough in the refrigerator for 30 minutes to help prevent spreading during baking.Scoop the Dough:
Using a cookie scoop or tablespoon, form dough balls and place them on the prepared baking sheet, about 2 inches apart.Bake the Cookies:
Bake for 10-12 minutes or until the edges are golden but the centers are still soft. Let the cookies cool on the sheet for 5 minutes, then transfer to a wire rack to cool completely.Make the Frosting:
Beat the cream cheese and butter until smooth and creamy. Gradually add the powdered sugar, vanilla extract, and salt (if using) until smooth and fluffy.Frost the Cookies:
Once the cookies are completely cool, spread or pipe the cream cheese frosting on top. Decorate with sprinkles or a drizzle of chocolate if desired.
Notes
For the best texture, chill the dough before baking.
Adjust the amount of food coloring based on your desired intensity of red color.
Store cookies in an airtight container at room temperature for up to 4 days.
Freeze the dough for up to 3 months—just scoop into balls and freeze before baking!